
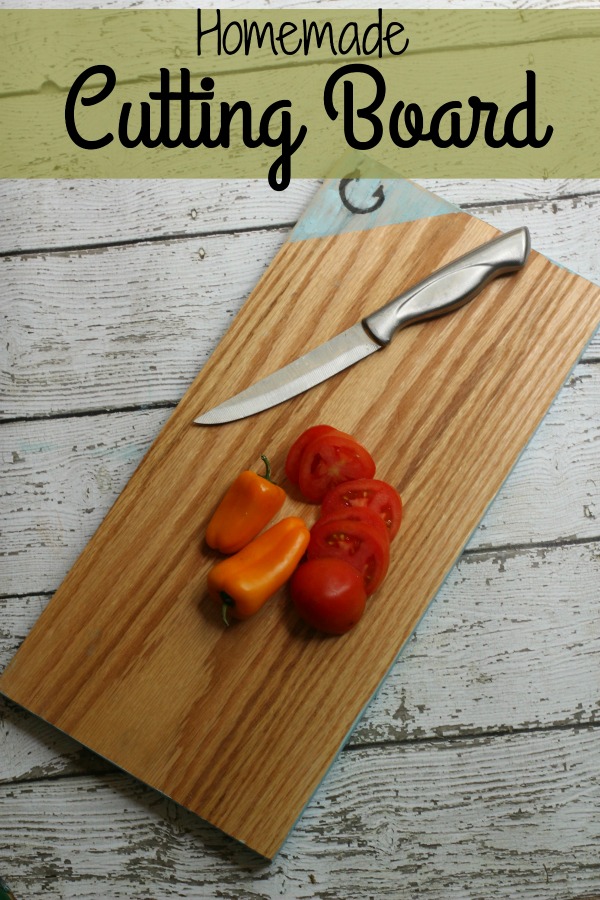
I have always wanted to try my hand at making my own cutting boards for the kitchen. I loved the idea of being able to choose the wood, any decorative accents, and especially the size. I started researching and digging the best way to go about it, without needing any power tools, or fancy equipment at all. I knew I needed to go hardwood, I have seen a lot of tutorials using a basswood slice as a cutting board but I was informed that the softwood would be quickly worn down and damaged by sharp knives- they do make great cheese boards though! I wanted to add just a subtle pop of color and also a small monogram for gifting.
Don’t you think a pretty dish towel, this handmade cutting board, and a jar of our Wood Butter would make a great hostess gift?
Supplies Needed:
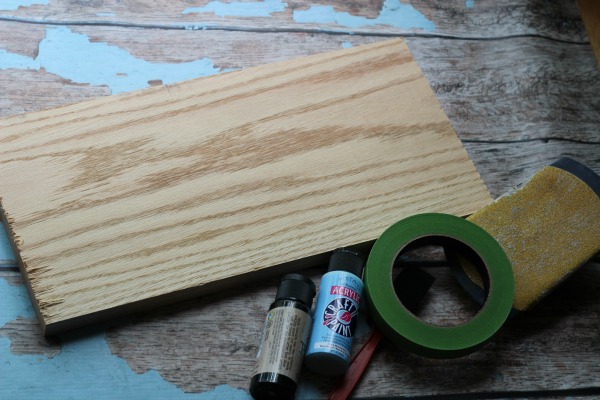
- Hardwood board-oak,ash,beech,maple
- sandpaper/sanding block
- Wood butter or mineral oil
- Optional-acrylic paint
- foam brush
- painters tape
Directions:
You can cut our own board to any size if you have the power tools to do it, we do and there may be times I will cut a bunch on my own but since I only needed one at this time I headed right down to Home Depot and had them cut me a 12” x 15” oak piece- it cost me about $6 including the charge for the cut. You can make yours any size you need.
Next you are going to want to sand the ends very well, they are rough after the cutting and need to be sanded and smoothed completely. I went ahead and went over the smooth top and bottom as well just to make sure it was completely smooth.
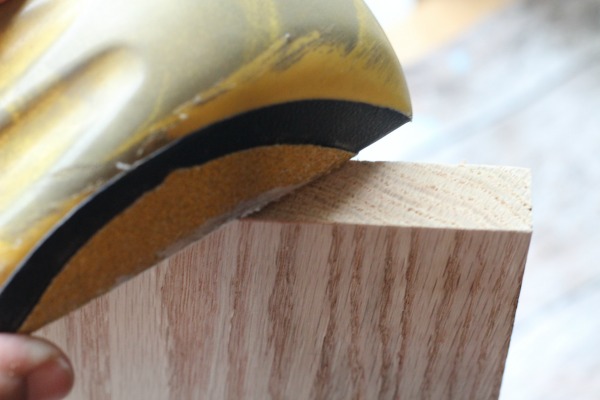
Wipe away sanding dust with a soft cloth.
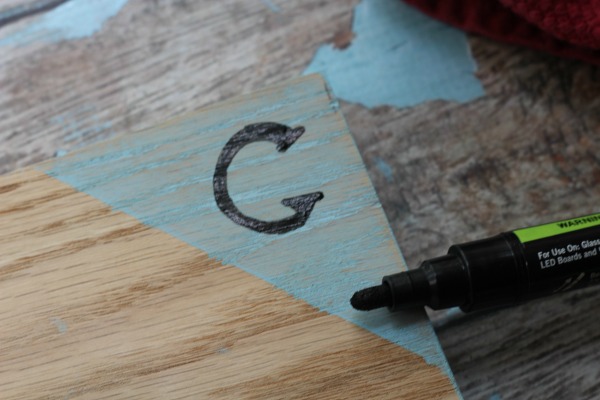
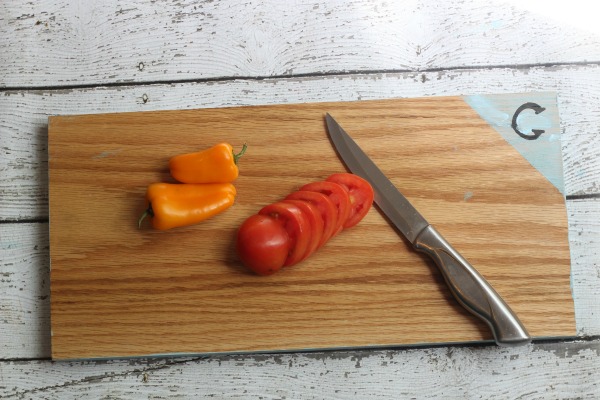
If you are going to paint the sides of your cutting board go ahead and put your painters tape to protect the top surface from paint, you really don’t want paint on the surface you will be cutting on, I added a very small corner for decoration.

Paint edges of board with foam brush, and the corner if you chose to do it like mine. I used a very light coat and wiped it off so that the grain still showed through. Allow paint to dry for several hours.

Once paint is dry to the touch you can use a paint pen or free hand a monogram or you could also label your cutting board-cheese, veggies, etc… Allow your monogram to dry. You could also add a clear coat to painted surfaces only to protect and make it last.
When all paint is thoroughly dry rub in a generous amount of wood butter or food grade mineral oil all over the board, buffing it in well.

Allow wood butter or oil to cut into the board for about 48 hours before first use.
Enjoy your new board!
Caring For Your New Board
- Do not allow your cutting board to sit in water or run through dishwasher, it will warp and ruin.
- Rub down with food grade mineral oil or wood butter about once every other month or as needed to keep it conditioned.
- Use a homemade antibacterial spray to clean the surface of your board.

DIY Cutting Board
Ingredients
- Hardwood board-oak,ash,beech,maple
- sandpaper/sanding block
- Wood butter or mineral oil
- Optional-acrylic paint
- foam brush
- painters tape
Instructions
- You can cut our own board to any size if you have the power tools to do it, we do and there may be times I will cut a bunch on my own but since I only needed one at this time I headed right down to Home Depot and had them cut me a 12” x 15” oak piece- it cost me about $6 including the charge for the cut. You can make yours any size you need.
- Next you are going to want to sand the ends very well, they are rough after the cutting and need to be sanded and smoothed completely. I went ahead and went over the smooth top and bottom as well just to make sure it was completely smooth.
- Wipe away sanding dust with a soft cloth.
- If you are going to paint the sides of your cutting board go ahead and put your painters tape to protect the top surface from paint, you really don’t want paint on the surface you will be cutting on, I added a very small corner for decoration.
- Paint edges of board with foam brush, and the corner if you chose to do it like mine. I used a very light coat and wiped it off so that the grain still showed through. Allow paint to dry for several hours.
- Once paint is dry to the touch you can use a paint pen or free hand a monogram or you could also label your cutting board-cheese, veggies, etc… Allow your monogram to dry. You could also add a clear coat to painted surfaces only to protect and make it last.
- When all paint is thoroughly dry rub in a generous amount of wood butter or food grade mineral oil all over the board, buffing it in well.
- Allow wood butter or oil to cut into the board for about 48 hours before first use.
- Enjoy your new board!
Did you enjoy this post? Find more money saving tips here.
This is a simple project and it certainly turned out nicely. I would have never thought to make my own cutting board which is rather amazing since my husband does a lot of wood working projects.
Thank you for sharing this with us on the #HomeMattersParty. We hope you’ll join us at 12AM EST on Friday when we open our doors again.
This is so cute! I love the addition of the little pop of color! I really need a new wooden cutting board as mine has since been ruined. This would be such a cute little board to bring out for cheese boards!